在这个数字化时代,人工智能技术正以惊人的速度改变着我们的生活方式和创造方式。音乐作为一种最直接、最感性的艺术形式,自然也成为了人工智能技术的应用场景之一。今天,我们将以 Vue 和 Node.js 为基础,利用现有的 API 来快速搭建一个 Suno AI 音乐站点。让我们一起探索这个令人兴奋的过程吧!
一、准备工作
在动手之前,我们需要确保已经准备好了必要的环境和工具:
Vue 和 Node.js 环境:确保你的开发环境中已经配置好了 Vue 和 Node.js,这将是我们构建前端和后端的基础。
文本编辑器或 IDE:选择你熟悉和喜欢的文本编辑器,如 VS Code、Sublime Text 等。
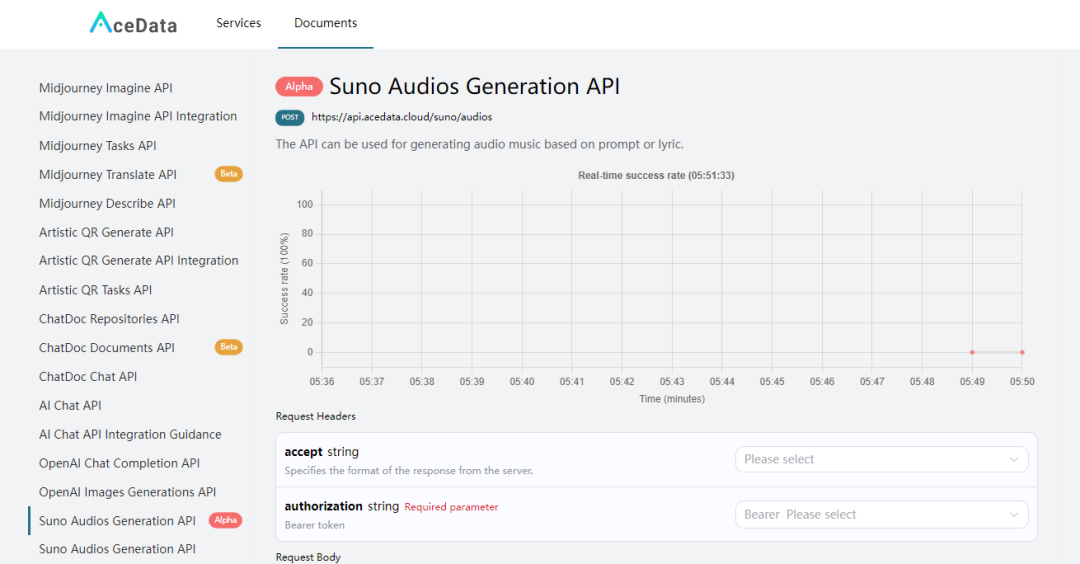
Suno AI音乐API密钥:这是我们生成音乐所需的关键。这里我们选择的是Acedata提供的Suno API,注册方法如下:
我们先到 Suno Audios Generation API 页面申请Suno API 服务:
如果你尚未登录或注册,会跳转到登录页面邀请您来注册和登录,注册登录之后会自动返回当前页面。
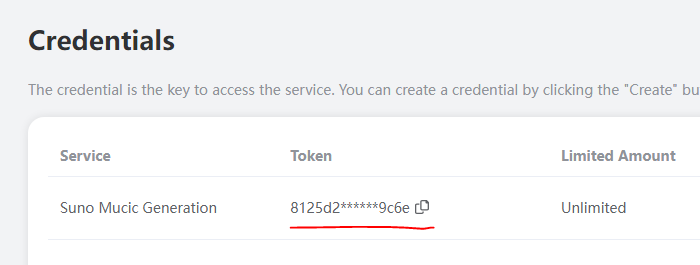
在首次申请时会有免费额度赠送,可以免费使用该 API。申请了API后,在 Credentials 查找到 Token,点击复制这个值备用,类似这样的:8125d23343388839c6e
好了,现在,我们获得了 Suno API,下面就可以来快速的搭建 AI 音乐生成平台了。
二、搭建前端和后端
1. 创建 Vue 项目
为了更清晰地组织前端和后端代码,我们将项目目录结构分为两个主要部分:frontend 和 backend。以下是具体的目录结构和说明:
目录结构
1 |
suno-music-site/ |
我们创建一个 suno-music-site 目录。
2.创建后端
创建后端目录和文件,在项目根目录下创建 backend 目录,并进入该目录:
1 |
mkdir backend |
初始化 Node.js 项目
在 backend 目录下初始化 Node.js 项目:
1 |
npm init -y |
安装 Express 和其他依赖
安装 Express 和所需的依赖包:
1 |
npm install express body-parser node-fetch |
创建 server.js
在 backend 目录下创建 server.js 文件,并添加以下代码:
1
2
3
4
5
6
7
8
9
10
11
12
13
14
15
16
17
18
19
20
21
22
23
24
25
26
27
28
29
30
31
32
33
34
35
36
37
38
39
const express = require('express');
const bodyParser = require('body-parser');
const fetch = require('node-fetch').default; // 使用CommonJS版本的node-fetch
const cors = require('cors'); // 引入cors中间件
const app = express();
const PORT = 3000;
app.use(cors()); // 使用cors中间件
app.use(bodyParser.json());
app.post('/generate-music', async (req, res) => {
const { prompt } = req.body;
const options = {
method: "post",
headers: {
"accept": "application/json",
"authorization": "Bearer 6675520380424c0167881d69c6e",
"content-type": "application/json"
},
body: JSON.stringify({
"prompt": prompt
})
};
try {
const response = await fetch("https://api.acedata.cloud/suno/audios", options);
const data = await response.json();
res.json(data);
} catch (error) {
console.error(error);
res.status(500).json({ error: 'An error occurred' });
}
});
app.listen(PORT, () => {
console.log(`Server is running on http://localhost:${PORT}`);
});
3.创建前端
回到项目根目录,创建 frontend 目录,并进入该目录:
1
2
3
cd ..
mkdir frontend
cd frontend
创建 Vue 项目
使用 Vue CLI 创建 Vue 项目:
1
vue create .
选择默认配置或根据你的需要进行配置。
编写前端代码
我们创建一个简单的界面来接收用户输入并显示生成的音乐。
在 frontend/src 目录下,修改 App.vue 文件,添加以下代码:
1 |
<template> |
4.解决跨域问题
在你的项目运行中,可能会出现跨域请求的问题,我们需要解决它。
你可以在现有的 vue.config.js 文件中添加开发服务器代理配置,以解决跨域问题。以下是修改后的 vue.config.js 文件内容:
1
2
3
4
5
6
7
8
9
10
11
12
13
const { defineConfig } = require('@vue/cli-service')

module.exports = defineConfig({
  transpileDependencies: true,
  devServer: {
    proxy: {
      '/generate-music': {
        target: 'http://localhost:3000',
        changeOrigin: true
      }
    }
  }
})
这样配置后,当前端发起请求到 /generate-music 时,代理服务器会将请求转发到运行在 http://localhost:3000 的后端服务,从而解决跨域问题。
如果还无法解决的话,你可能还需要处理一下。由于浏览器安全策略的限制,前端和后端运行在不同的域(例如,localhost 和 192.168.0.235)时,浏览器会阻止跨域请求。我们需要在后端服务器中设置适当的 CORS 头信息来允许跨域请求。
你可以使用 cors 中间件来解决这个问题。
安装 cors 包:
1
npm install cors
在 server.js 文件中引入并使用 cors 中间件:
这样,后端服务器将允许来自所有来源的请求。如果你想限制特定来源的请求,可以这样配置 cors 中间件:
1
2
3
app.use(cors({
  origin: 'http://192.168.20.235:8081' // 允许的前端URL
}));
这样应该能解决CORS问题,并允许前端正常调用后端API。
如果 Node.js 无法直接使用 ES 模块(ES Module)加载 node-fetch,因 node-fetch 是一个 ES 模块。解决这个问题的一种方法是将 node-fetch 替换为一个可以在 CommonJS 环境中使用的版本。
你可以安装 node-fetch 的 CommonJS 版本,并修改 server.js 文件中的引入方式。
首先,删除项目中已安装的 node-fetch:
1
npm uninstall node-fetch
安装 node-fetch 的 CommonJS 版本:
1
npm install node-fetch@2
在 server.js 文件中,将引入方式修改为动态引入(dynamic import),上面的代码已经修改好了。
三. 运行项目
- 启动后端服务
在 backend 目录下,启动后端服务:
1
node server.js
- 启动前端服务
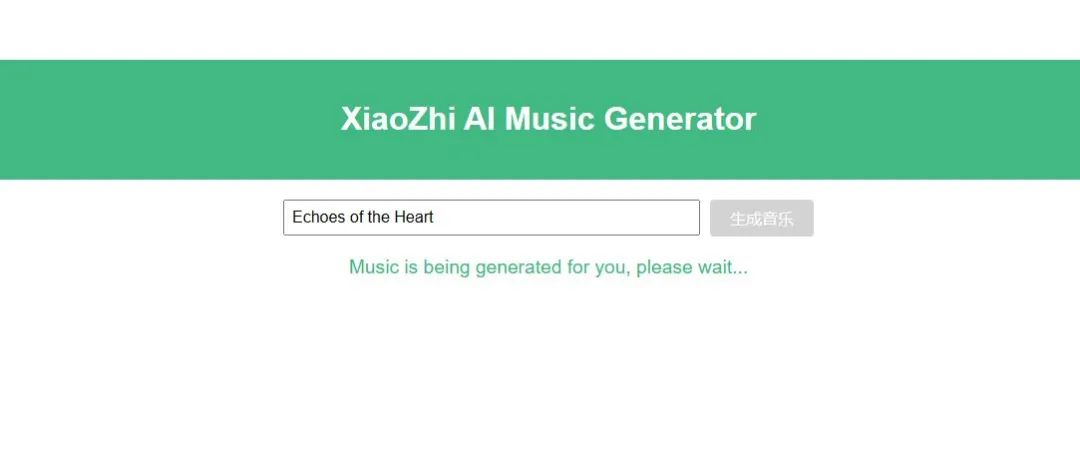
在 frontend 目录下,启动前端服务:打开浏览器,访问 http://localhost:8080(Vue CLI 默认端口),你将看到一个简单的界面,输入一个提示词并点击“Generate Music”按钮,即可生成音乐。1
npm run serve
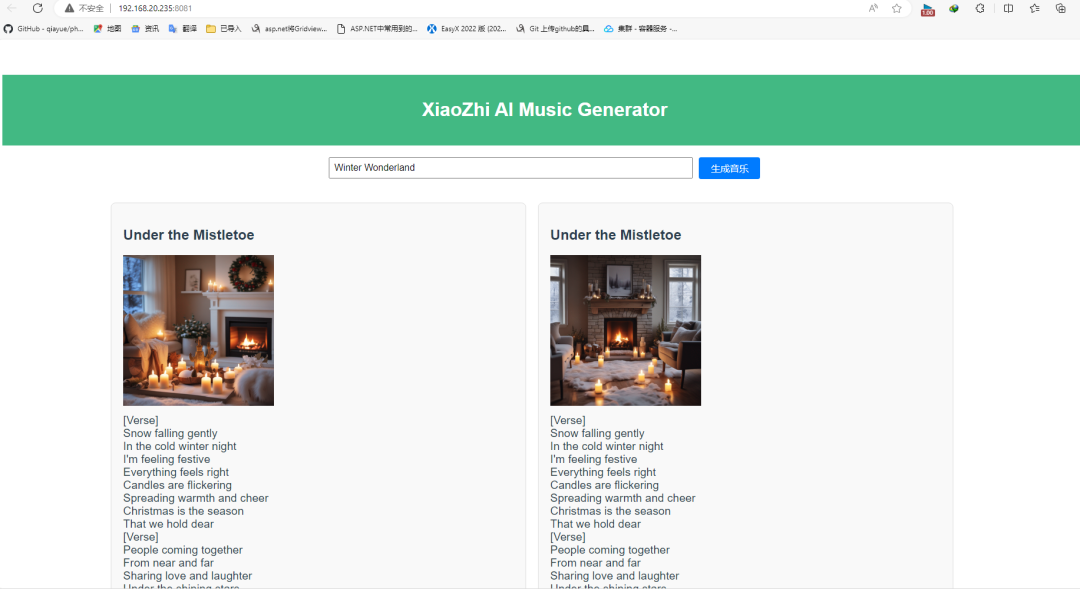
默认会生成两首音乐,有 MP3 和 MP4 视频,点击即可播放 AI 生成的音乐。
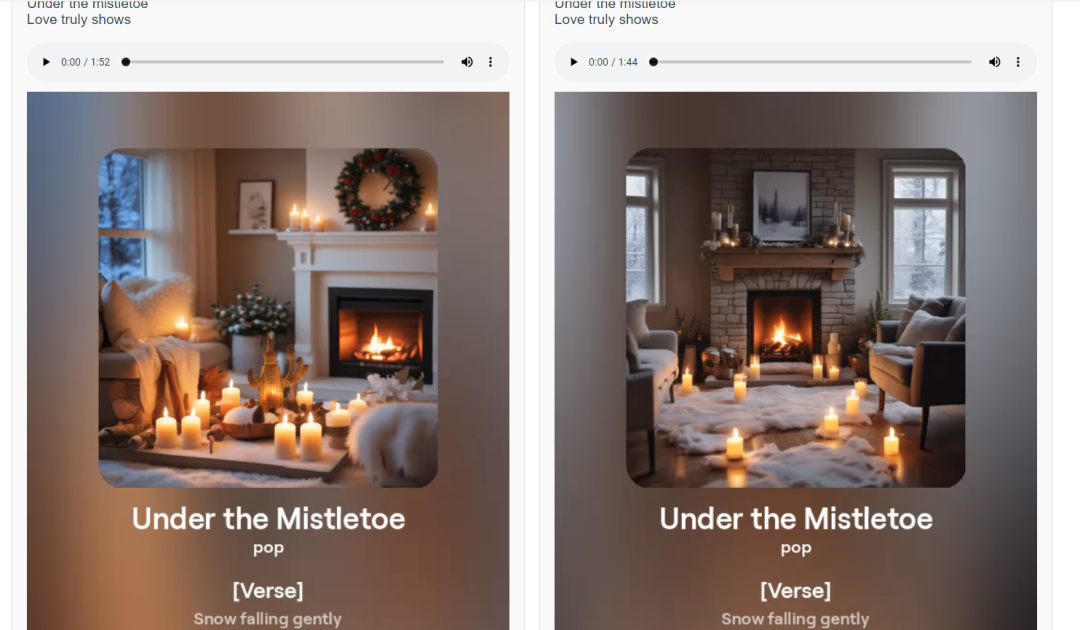
点击以下音频或视频链接试听:
MP3试听 https://cdn1.suno.ai/ab8dcd9b-3527-46da-b0c7-4d1a78b51846.mp3
MP4试看 https://cdn1.suno.ai/3cbd5b7b-7354-48a3-8158-9cd87e1b116b.mp4
四、结语
通过这种方式,我们成功地将前端和后端代码分离,清晰地组织在不同的目录下,同时也实现了跨域请求。希望这个项目能给你带来启发,并帮助你更好地理解和实现类似的项目。
这样我们就搭建好了一个本地的 AI 音乐生成平台,如果你愿意,可以将代码打包后上传到服务器,再绑定一个域名,就可以提供给其他小伙伴一起来使用了。
通过 Vue 和 Node.js,以及 Acedata 提供的 Suno AI 音乐 API 的强大功能,我们在短短的时间内成功搭建了一个AI音乐生成网站。这个过程不仅展示了人工智能技术在音乐创作中的威力,也向我们展示了如何利用现有的技术来创造出令人惊叹的新体验。希望这个项目能够激发你的创造灵感,并让你更加深入地探索人工智能与音乐的奇妙结合!
在线体验站点: